You can configure your device directly using its built-in WiFi and Web servers. The advantage to this option is that you don't need any internet in order to use it this way.
We suggest getting your device setup using the Altimeter Cloud method ideally as this is the easiest way to manage your Mercury and offers the best data and charts.
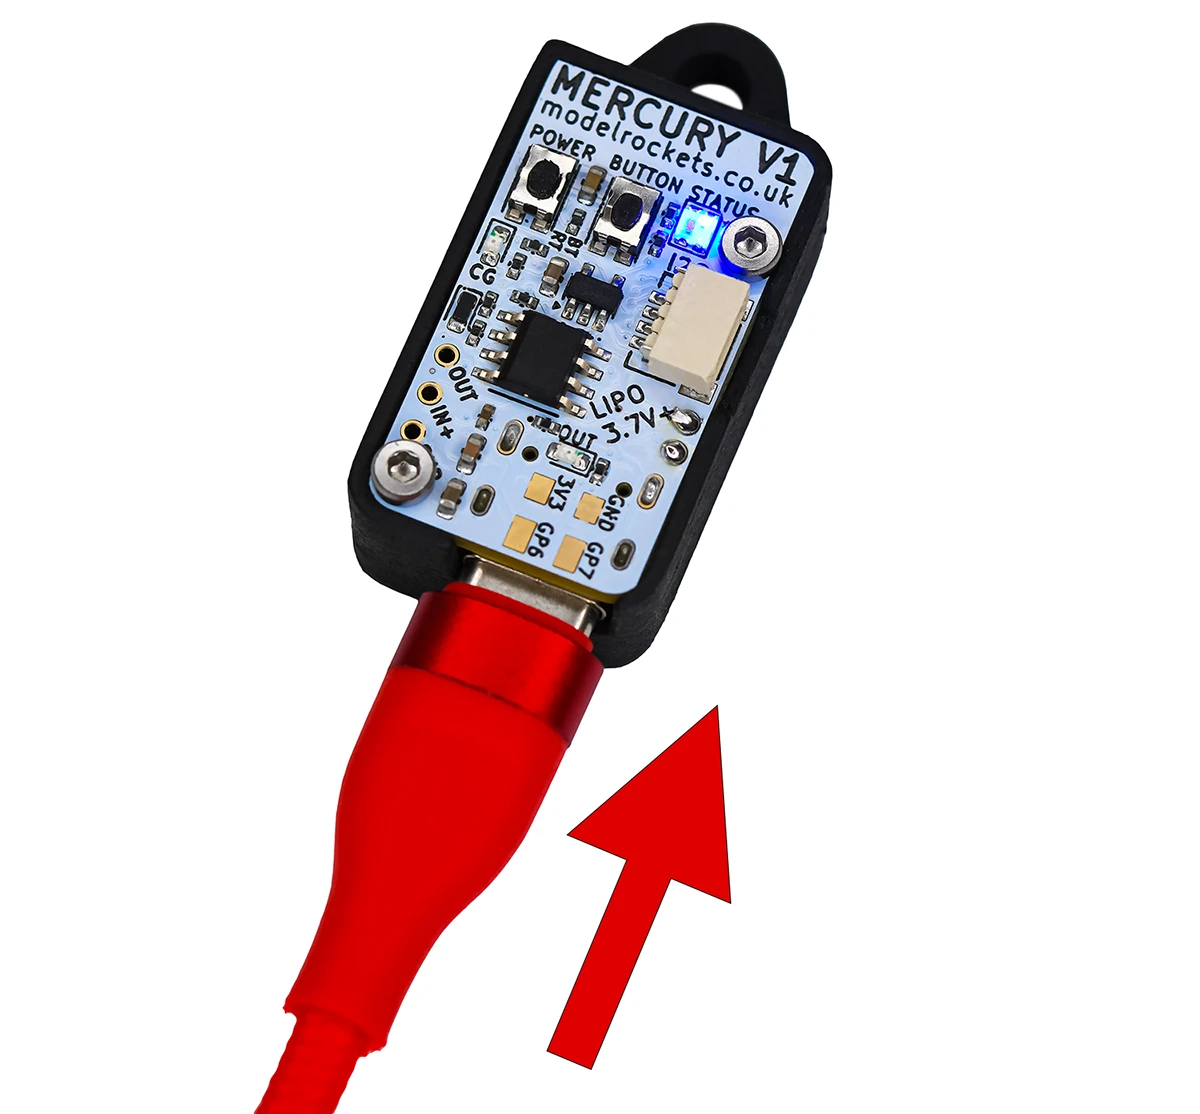
Plug any USB lead into your device (it does need to supply power though). And then turn it on. The altimeter will enter WiFi mode (configuration mode) when a USB lead is present and it's turned on; without the USB power present it will enter normal flight mode instead.
Your device will have a slow strobing blue LED status (it could be green if you have already configured WiFi networks and it's connected to one!). This means its WiFi and Web server are on and you can connect to it.
You will need the default AP Password from the back of your packaging, or you can hold down the BUTTON for 10 seconds until it goes white to remove the WiFi password temporarily.
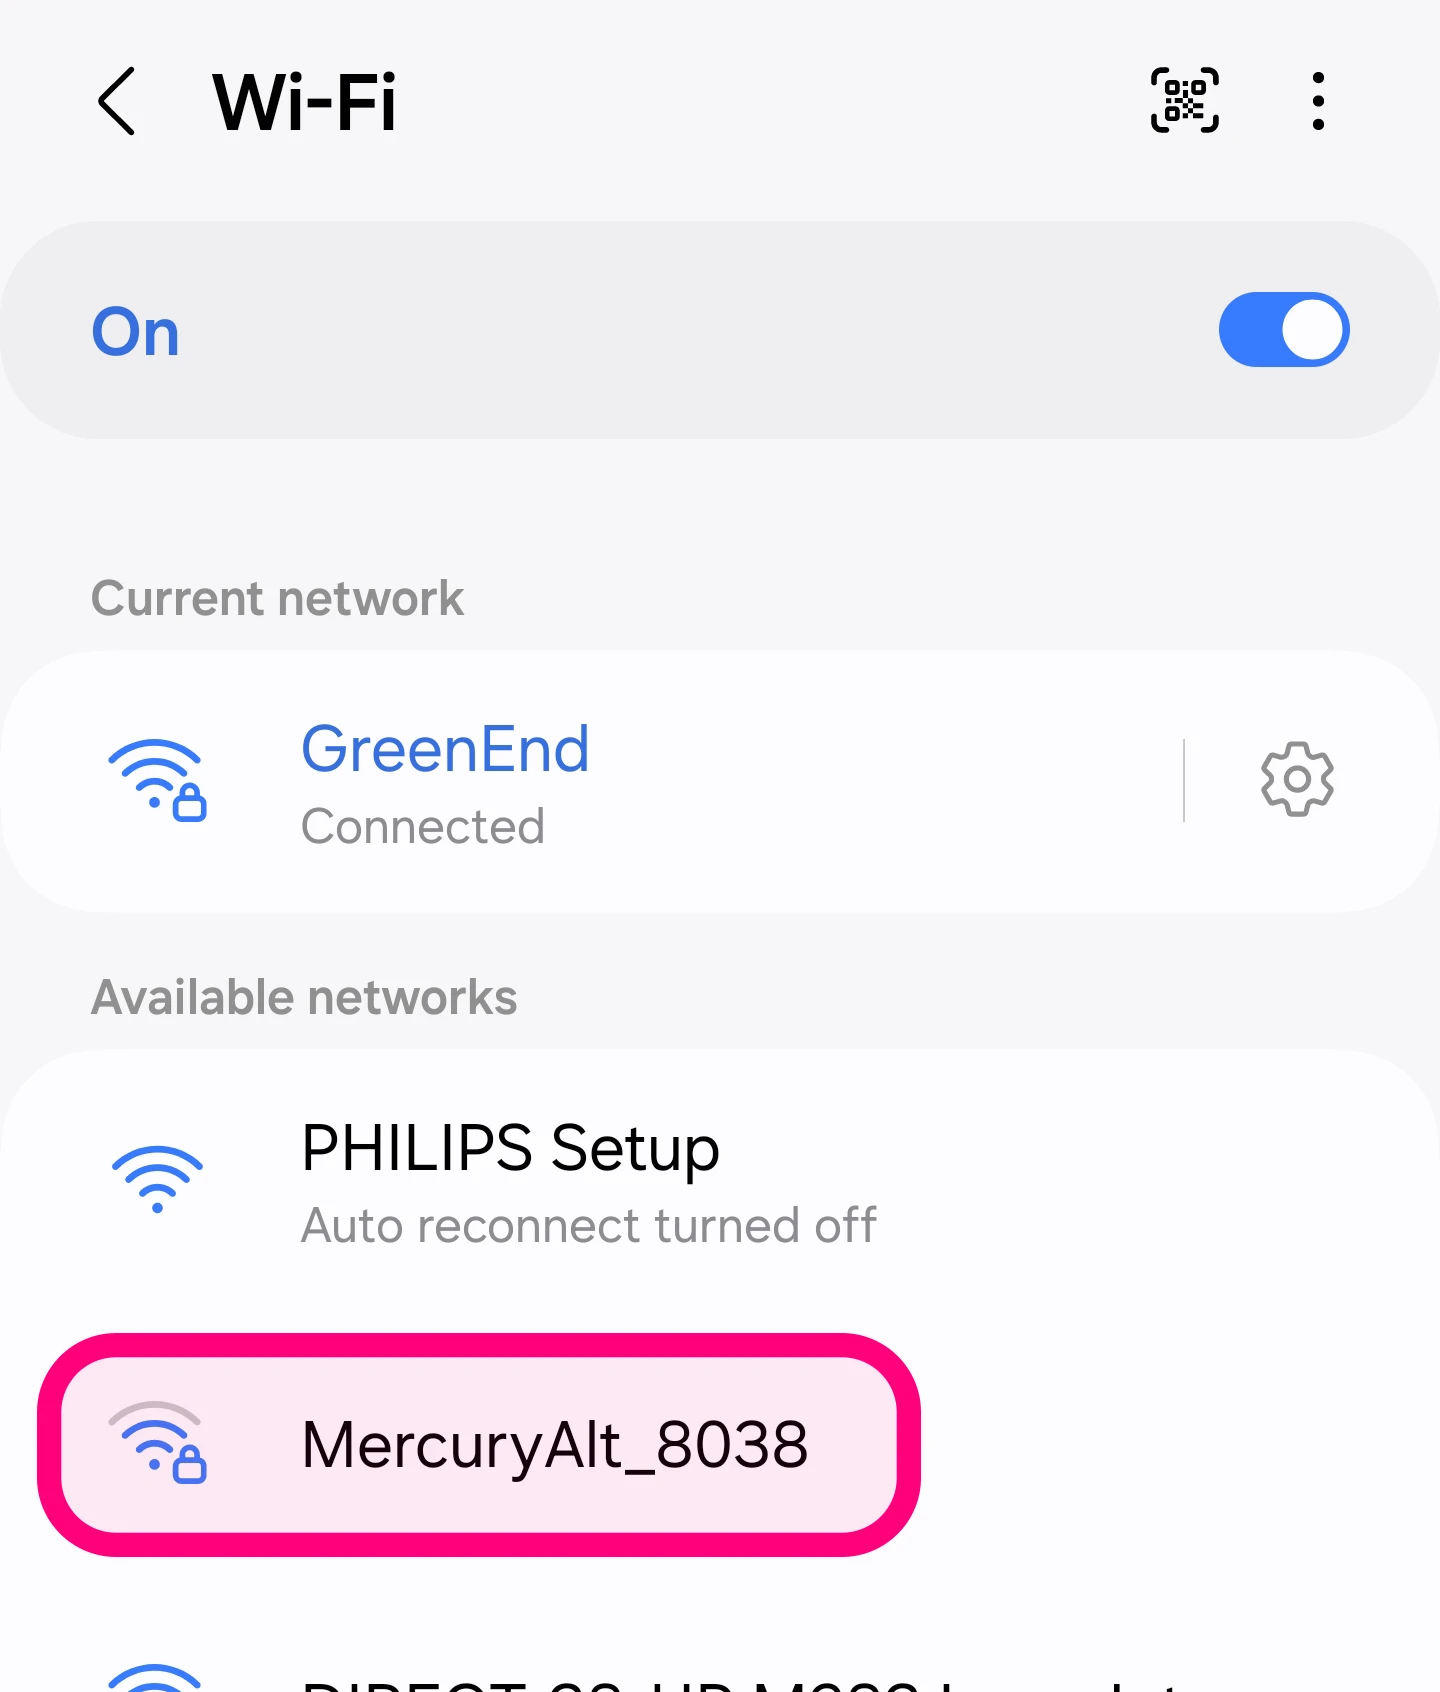
Select the Mercury's WiFi and connect to it on your device.
You will need the default AP Password from the back of your packaging, or you can hold down the BUTTON for 10 seconds until it goes white to remove the WiFi password temporarily.
Select the Mercury's WiFi and connect to it on your device.
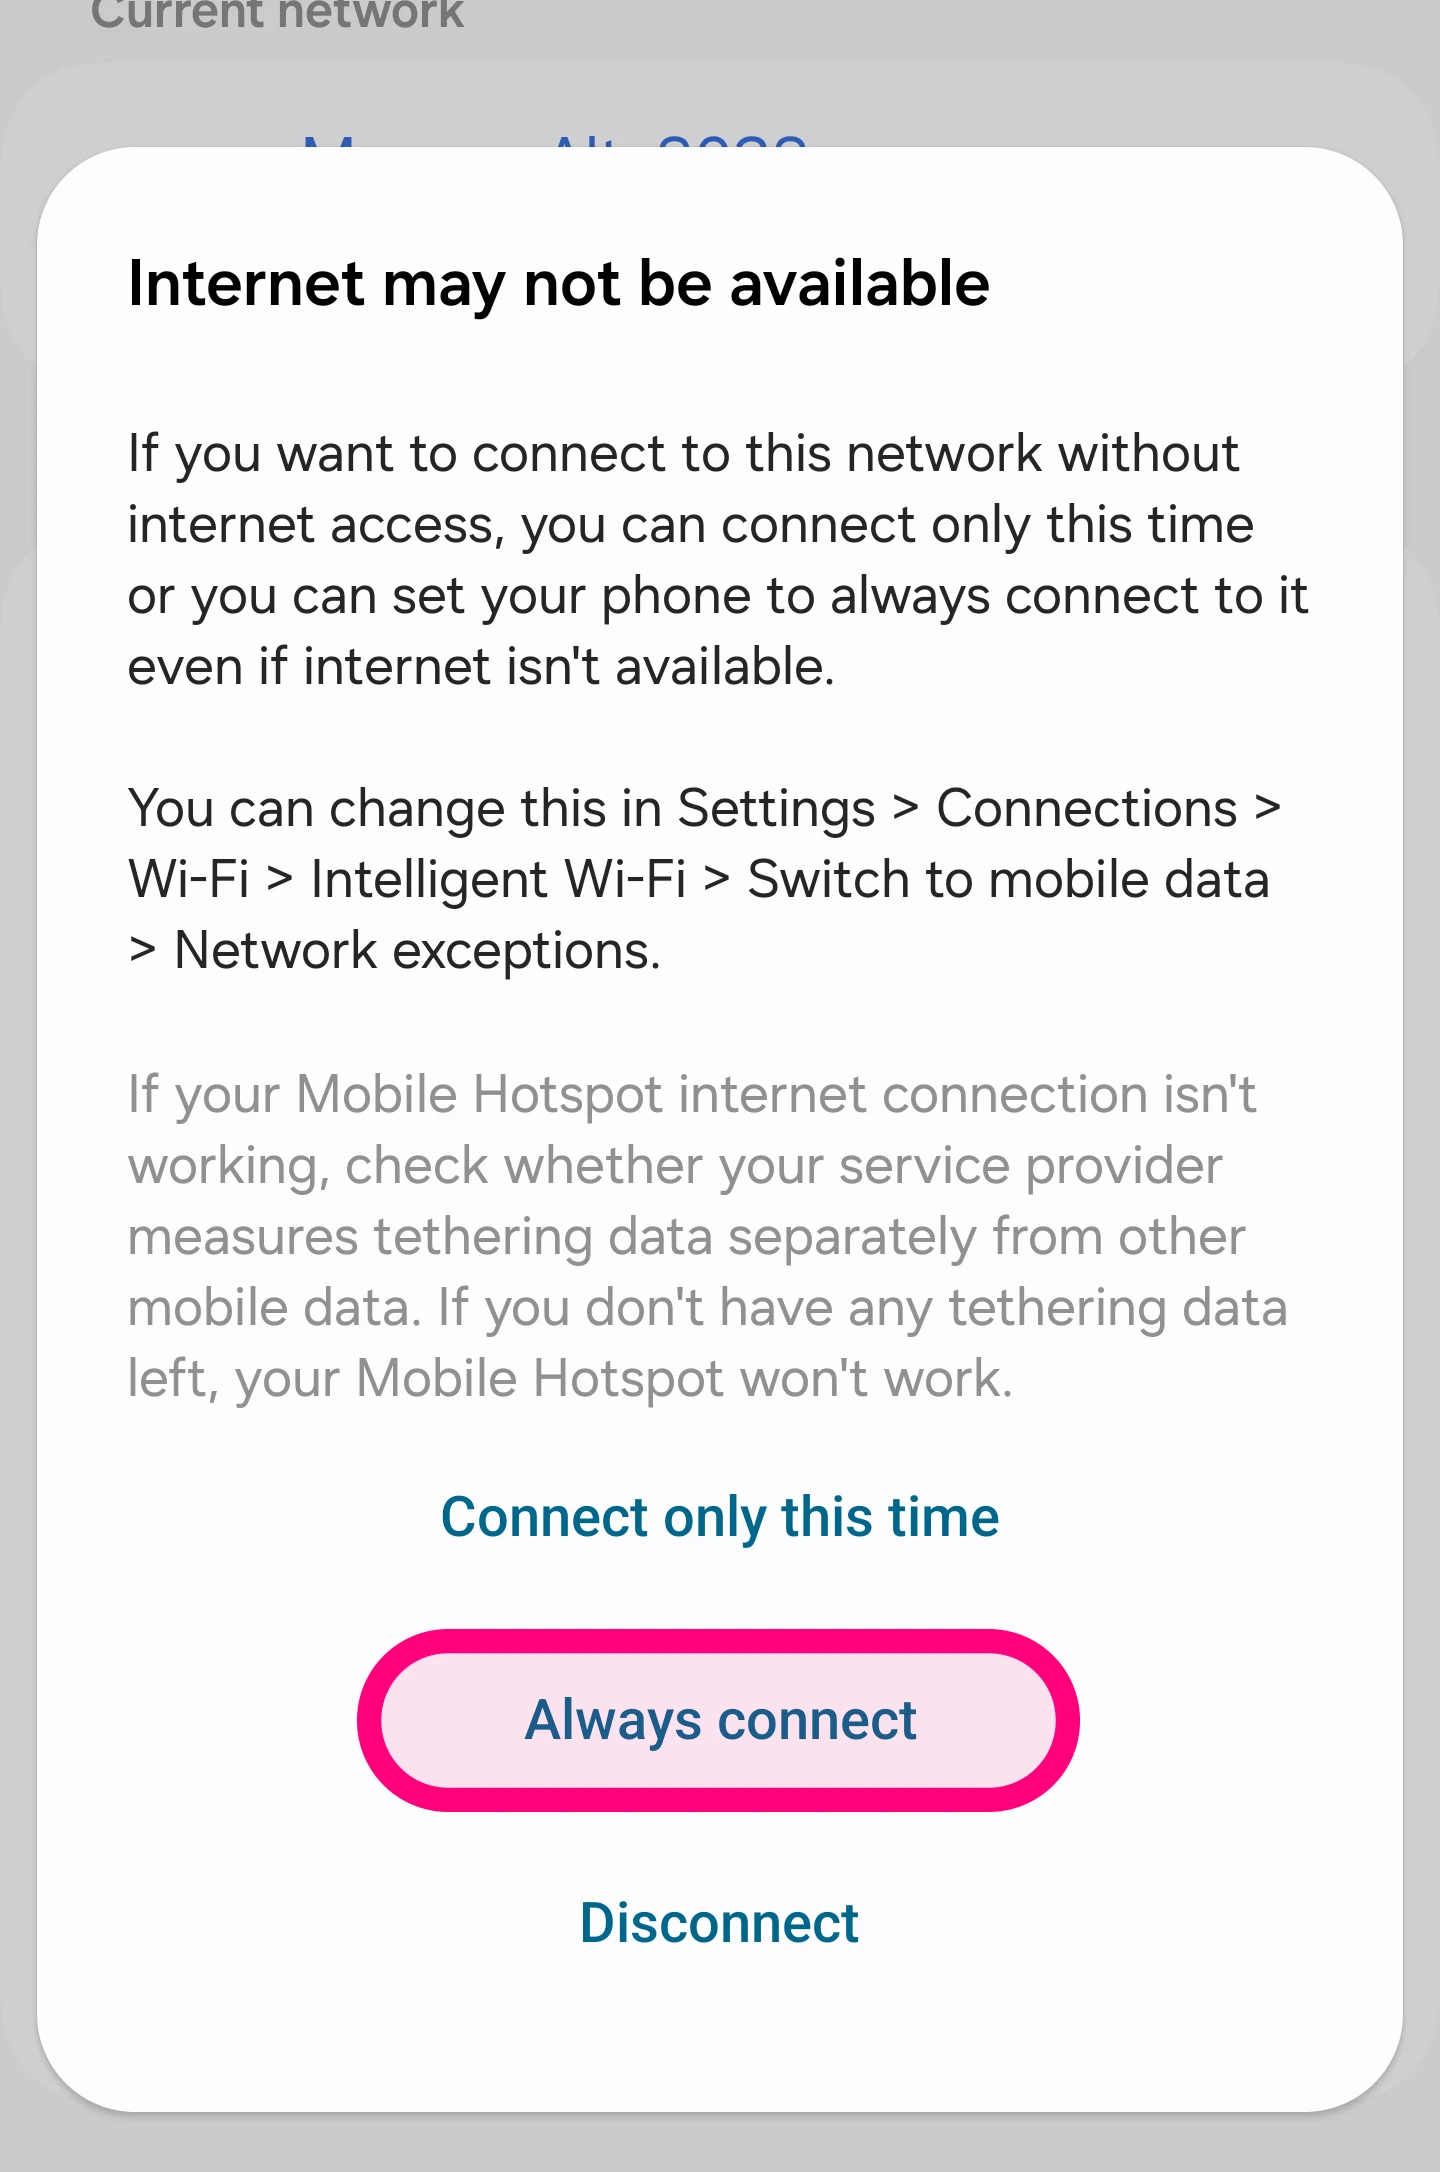
After a short while your device is likely to tell you that there is no internet on this WiFi network and do you still want to connect.
You need to confirm that you do to continue.
You need to confirm that you do to continue.
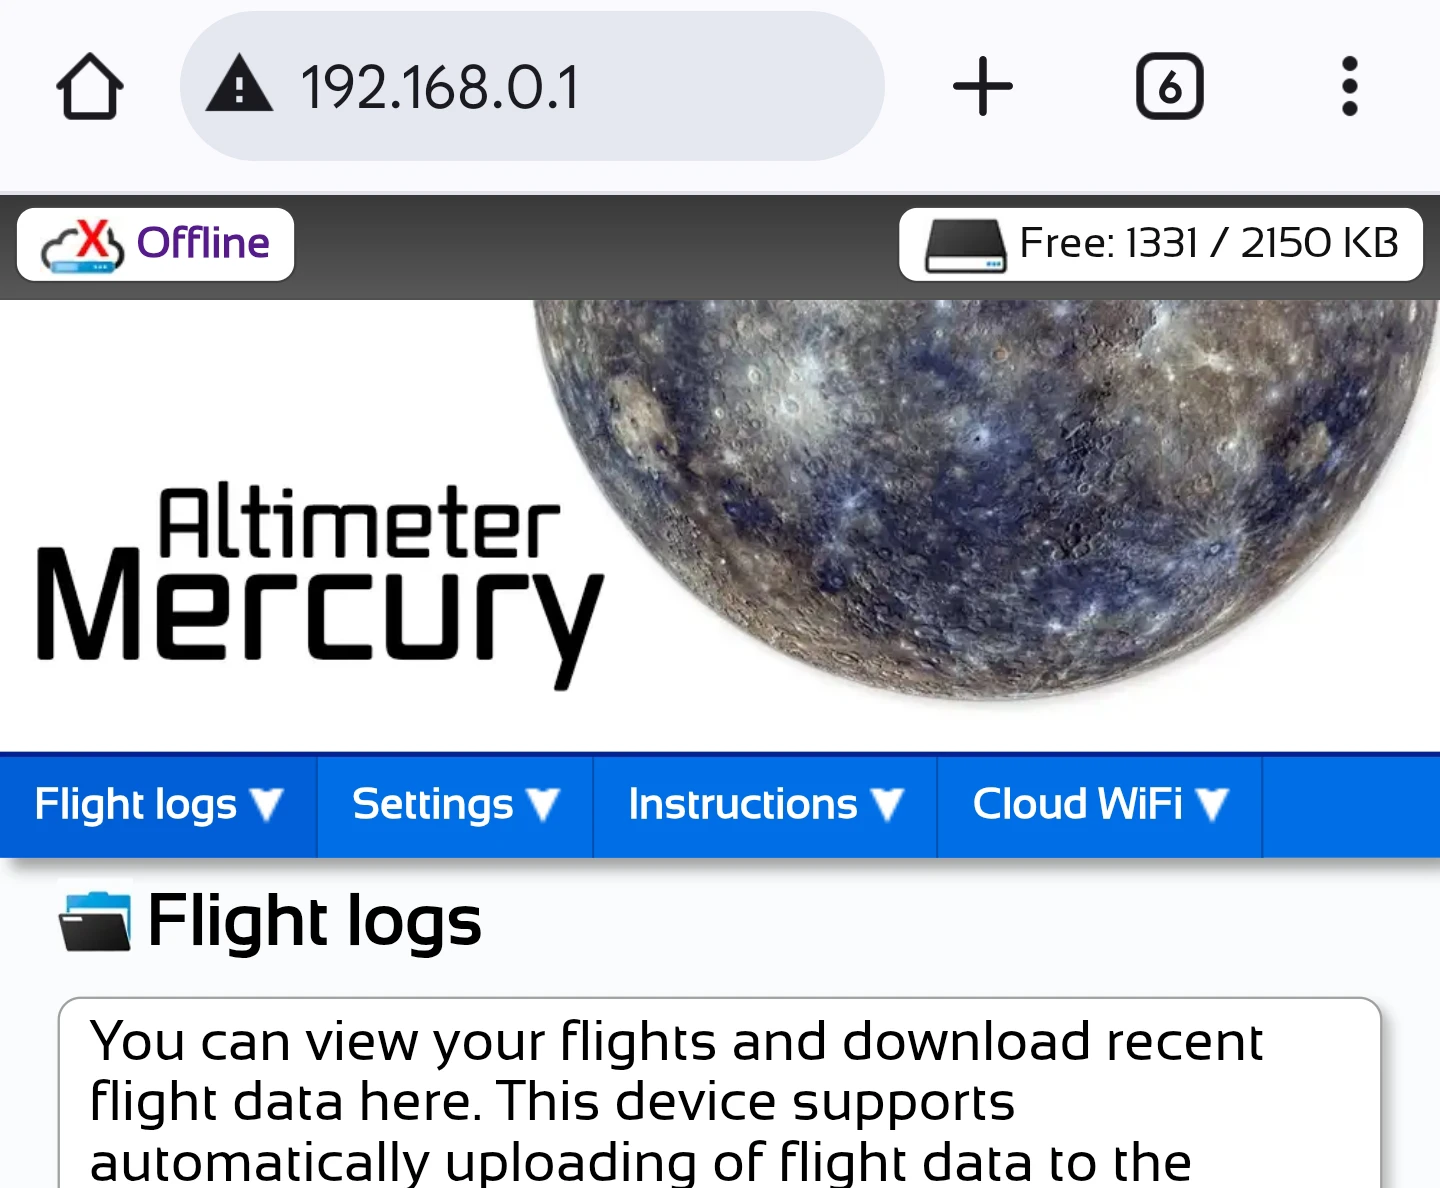
You can now load your web browser on the device that you connected to the altimeter's WiFi on. You will need to visit the following webpage in your browser. It's worth typing the http:// part as well to be sure it will work correctly.
The altimeter's internal webserver flight log page will now load in your browser.
http://192.168.0.1
You can click this link (http://192.168.0.1) if you're on the device you connected from as well.The altimeter's internal webserver flight log page will now load in your browser.