The Snapshot Screen is organised into four tabs for your flight data, plus a pull-down settings panel. This page covers each one.
Moving between tabs: the four icons running along the top — rocket, chart, chip, clock — are the tab bar. Either tap an icon to jump straight to that tab, or swipe left or right anywhere on the tab content to move one across. The selected tab sits in a darker blue box so you can always see where you are.
Flight tab — your most recent flight
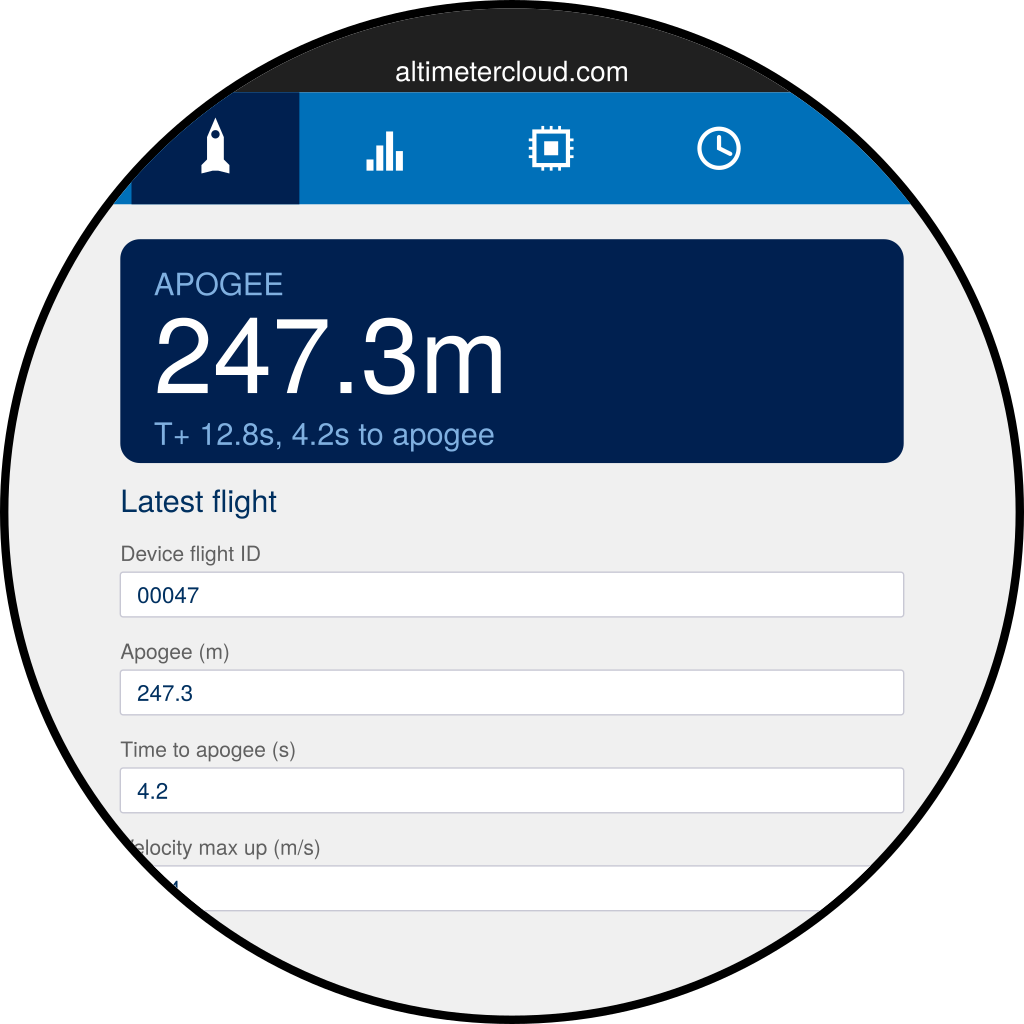
The blue box at the top pulls out the three things you’ll want straight away — apogee, total flight time and time to apogee. Underneath it, every statistic reported by the altimeter is listed in order:
- Apogee, max velocities and max accelerations
- Burnout time and velocity
- Ejection time, landing time and descent velocity
- Launch-pad tilt and max tilt during burn
Swipe up or down to scroll through the list.
This tab only shows the most recent flight. To look back at earlier flights, use the History tab further along.
Charts tab — the shape of the flight
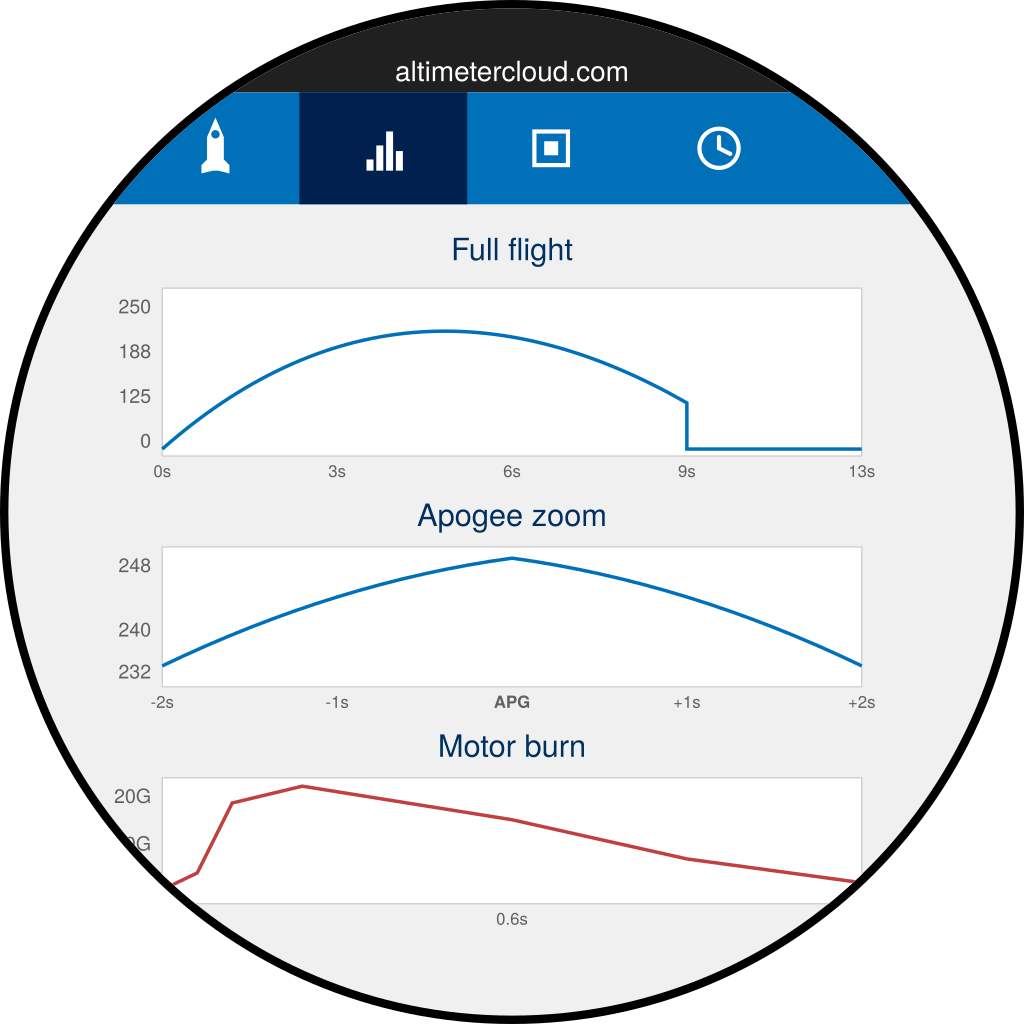
Three small charts sit one above the other:
- Full flight — altitude across the whole flight, from launch to landing.
- Apogee zoom — the four seconds around apogee so you can see the curvature at the top.
- Motor burn — acceleration during the first fraction of a second, ending at burnout.
Each chart scales itself to the flight, so the shape is readable whether the rocket reached thirty metres or three kilometres.
If the motor burn chart shows “no data”, the altimeter didn’t pick up a distinct burnout. That’s normal on sustainers and on some short motors.
Altimeter info tab — details about the device
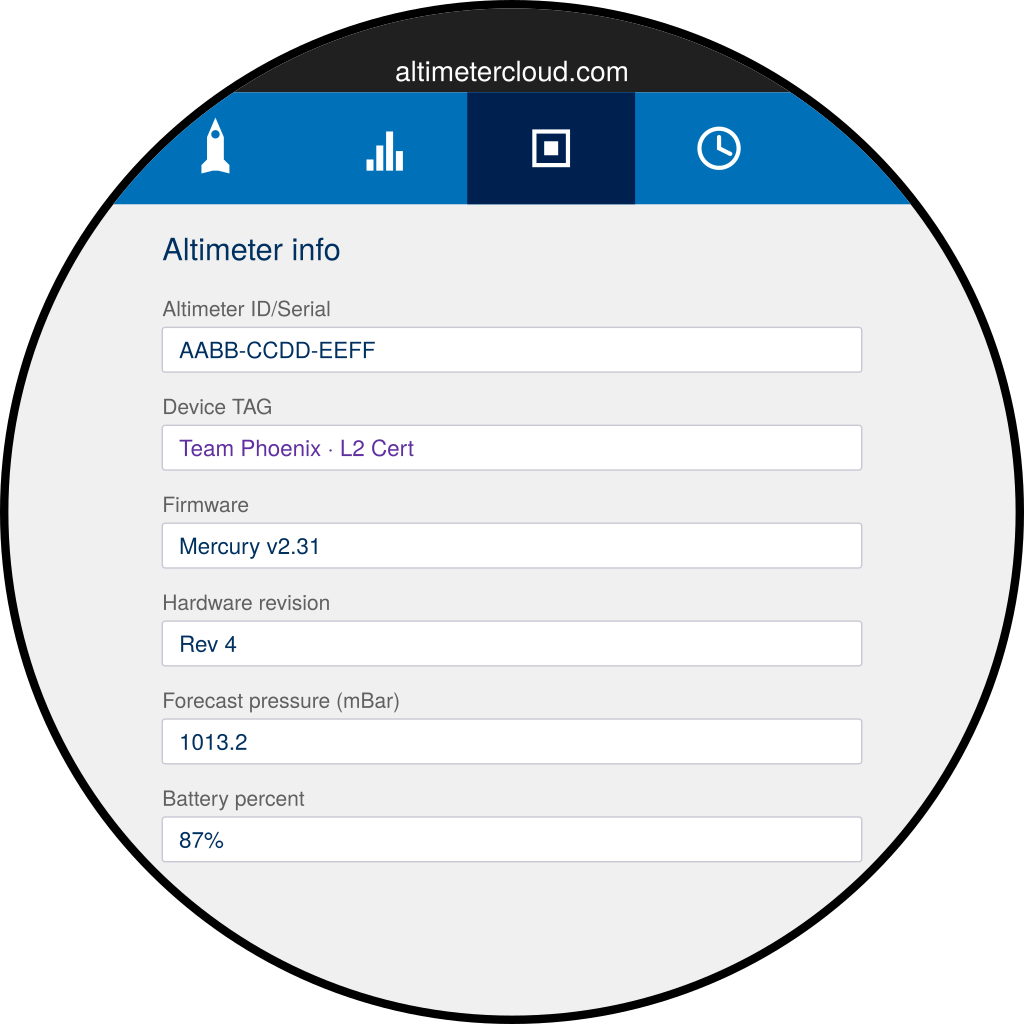
- Altimeter ID/Serial — the altimeter’s MAC address. You’ll need this when pairing with Altimeter Cloud.
- Device TAG — whatever label you’ve set on the altimeter, typically a team or rocket name. The TAG also appears next to each flight in the history list, so pick something you’ll recognise at a glance.
- Firmware and Hardware revision — useful when reporting a problem.
- Forecast pressure and Battery percent — updated live while the altimeter is connected.
History tab — every flight you’ve recorded
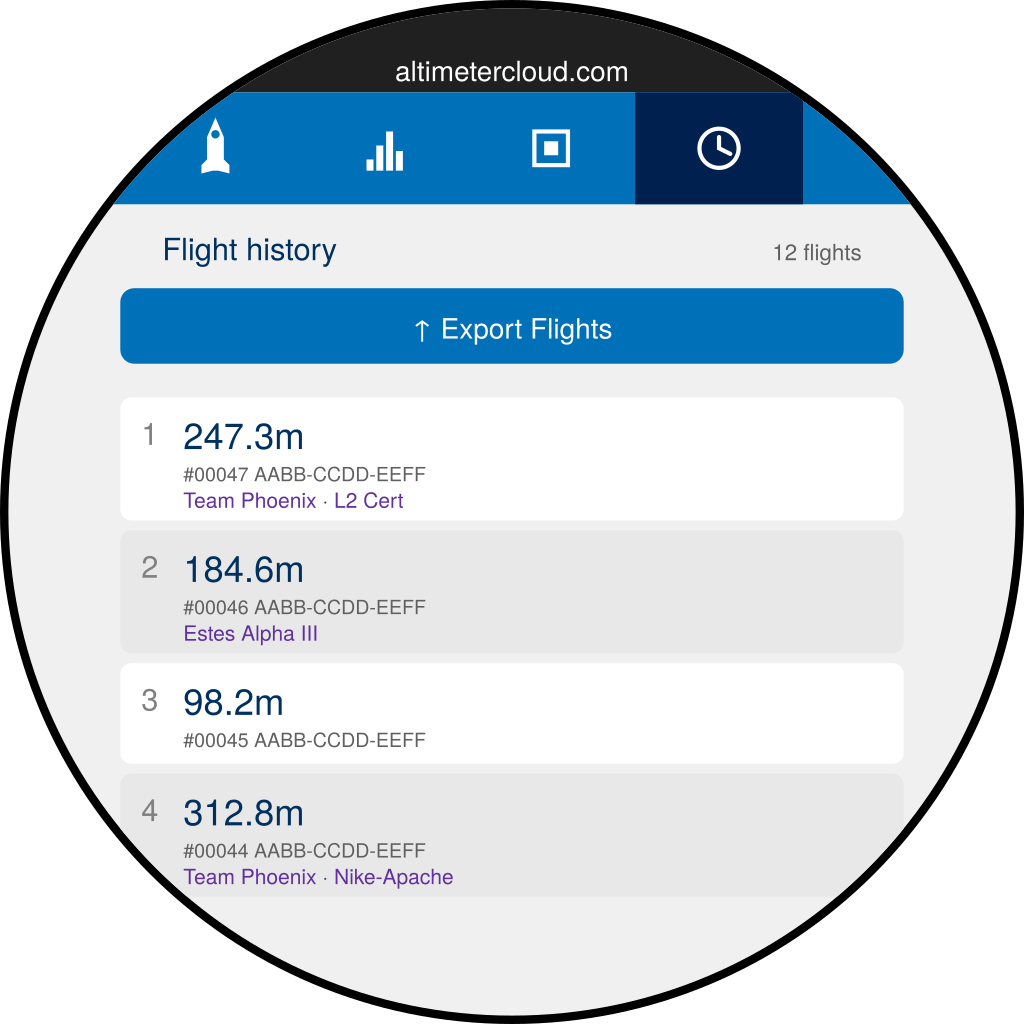
Each row shows the apogee, the altimeter’s flight ID, the altimeter’s serial and the TAG that was set at the time of the flight. The count in the top right tells you how many are stored — the Snapshot Screen holds up to 200.
Tap any row to reload that flight’s data onto the Flight and Charts tabs. When you’re looking at a stored flight rather than live data, an orange LOADED DATA strip appears near the top of those tabs to remind you.
The blue ↑ Export Flights button at the top opens the WiFi & Export menu — covered on the next page.
Quick settings — swipe down from the top
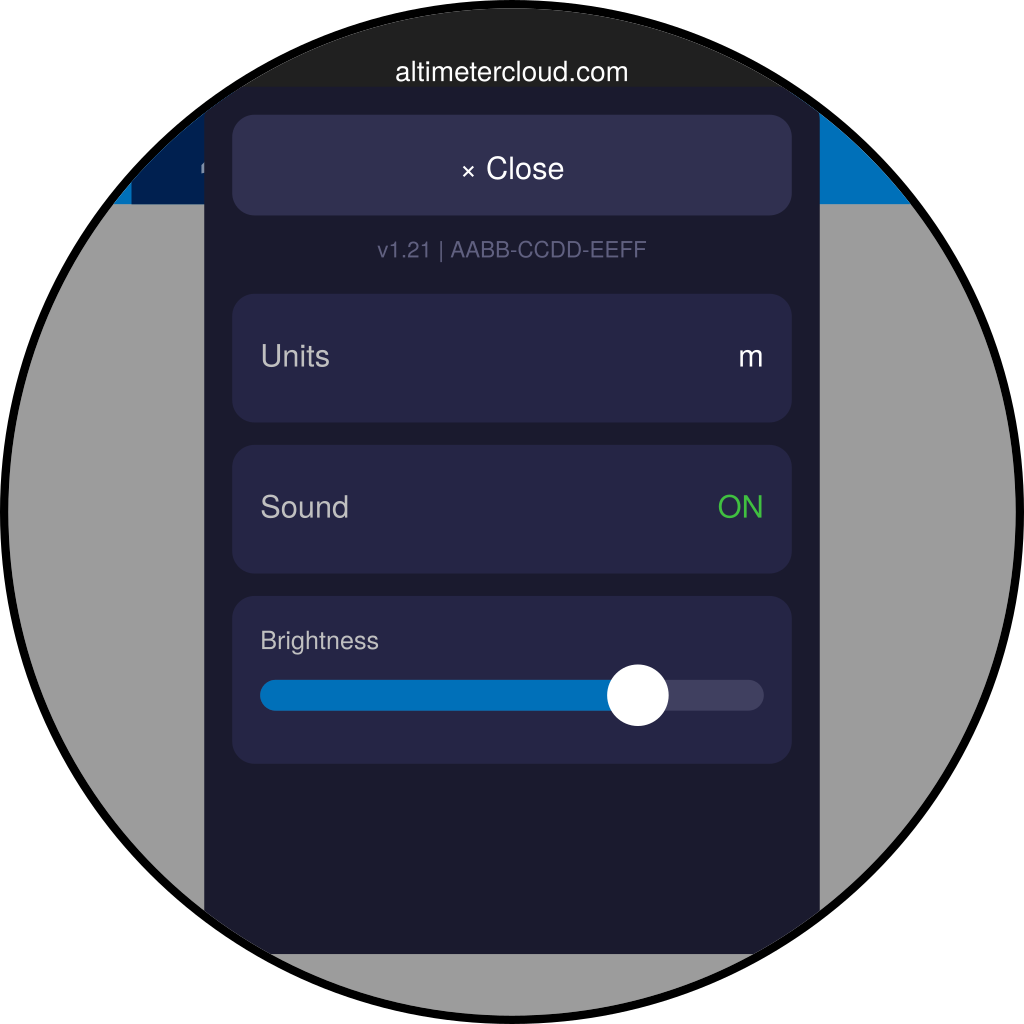
Swipe down from the very top edge of the screen to open the settings panel:
- × Close — dismiss the panel.
- Screen firmware & MAC — shown together on one line for when you need the details.
- Units — tap to switch between metres and feet. Everything on the device updates together.
- Sound — mutes or un-mutes the connection, upload and alert tones.
- Brightness — drag the slider. Your setting is saved automatically.
Sleep and wake
After 20 seconds of inactivity the screen will dim and then sleep to save battery. Tap the screen, or connect an altimeter, to wake it again.